How To Screenshot on Laptop Screen
There always comes a time that you would like to capture a page, image, or information on your computer screen instead of downloading the page.
How do you now take a screenshot on your laptop computer?
There are basically two ways, one is to use screenshot software and the other is to use your computer keyboard shortcuts keys to print the screen.
For the screenshot app, there are free ones for Windows computers to get the best shot.
Depending on the PC brand, maybe Lenovo, HP, Dell, Asus, Acer, Toshiba, etc, and the operating system, whether it’s Mac or windows, which may differentiate how you can make screenshots.
You can make a screenshot with Windows and the add-ons for the screenshot and save the image to the image file folder.
You will locate The “Print” button at the top right of your PC keyboard, click on this to print the page as a screenshot.
To paste in another program you can use the screenshot image with the keyboard shortcut CTRL + V.

Windows screenshot
This works with computers running on any of all the Microsoft Windows versions, including the old versions like Windows 7, 8, and 10.
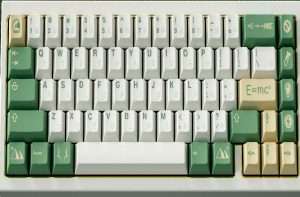
In the upper right corner of your computer keyboard, usually above the BLOCK with the four arrows, there is the Print or PRTSCR button which enables you to create a screenshot.
There may be differences in the positions of the keys and functions, for example in HP stream laptops, envy, EliteBook, Spectre, Dell latitude, Inspiron 15, Toshiba Satellite C55, etc as we’ve noticed in some of these laptops.
However, it should normally be in the upper-right corner of your keyboard.
When you press the Print or PRTSCR button, Windows saves the content from the entire computer screen as an image.
However, this can not be saved automatically as a file but remains on the clipboard.
Note that, you can view your image on the clipboard, and to save the screenshot, just open a program of your choice that can accept the image file and paste it in order to save it to your computer.
For example, you open the program “PAINT” provided with Windows, and click Paste on the Edit menu: The screenshot you just created is pasted into the program and can be saved under “file”/”Save”.
In other programs in your Windows powered PC, such as Word, the screenshot image can also be pasted directly from the Clipboard by pressing the CTRL + V key combination and the program should now display the contents of the Clipboard that was copied to the document.
If you want to save the screenshot as an image, you should not copy it into an Office program, but create a new image with the screenshot.
This is done by adding the screenshot from the Clipboard directly into a graphics program such as Paint (located at each Windows!) or the free program IrfanView.
The screenshots can then be saved as a graphic from both: for example, the JPEG format (which takes much less space than the BMP format, which paint often automatically suggests) or the BMP format.
To show only the current window on the screen in your screenshot, press the left ALT key together with the “Print” button and Windows will save only the currently selected window as a graphic.
Otherwise, everything is the same, just like screenshots from the entire screen, the image is stored in the Clipboard and can be pasted into most programs.
To make a screenshot with Vista, Windows 7, 8, and 10 OS versions, it’s simple but the only thing that seems to be difficult for people is how to save the screenshot in the Windows clipboard and later paste it into programs like Word Processor or Paint but work very well on Windows Vista and Windows 7.
With Vista and Windows 7, it’s easier, you can as well use the “Snipping Tool” and also select an area directly on your screen and save it as a file.
To make screenshots with Windows 8 and Windows, it’s easier since you can save the screenshot either in the Clipboard or as a file without an additional program.